


1、安装nginx
(1)直接使用命令yum -y install nginx
[root@localhost bin]# yum -y install nginx
Loaded plugins: fastestmirror, langpacks
base                                                     | 3.6 kB     00:00
extras                                                   | 3.4 kB     00:00
updates                                                  | 3.4 kB     00:00
Loading mirror speeds from cached hostfile
 * base: mirrors.aliyun.com
 * extras: mirrors.aliyun.com
 * updates: mirror.bit.edu.cn
No package nginx available.
Error: Nothing to do
报错,需要添加yum源
(2)先看看该目录下面都有什么文件
[root@localhost yum.repos.d]# pwd
/etc/yum.repos.d  #看看该目录下面的文件
[root@localhost yum.repos.d]# ls
CentOS-Base.repo  CentOS-Debuginfo.repo  CentOS-Media.repo    CentOS-Vault.repo
CentOS-CR.repo    CentOS-fasttrack.repo  CentOS-Sources.repo
[root@localhost yum.repos.d]#
(3)添加yum源
[root@localhost yum.repos.d]# rpm -ivh http://nginx.org/packages/centos/7/noarch/RPMS/nginx-release-centos-7-0.el7.ngx.noarch.rpm
Retrieving http://nginx.org/packages/centos/7/noarch/RPMS/nginx-release-centos-7-0.el7.ngx.noarch.rpm
warning: /var/tmp/rpm-tmp.6JdSVO: Header V4 RSA/SHA1 Signature, key ID 7bd9bf62: NOKEY
Preparing...                          ################################# [100%]
Updating / installing...
   1:nginx-release-centos-7-0.el7.ngx ################################# [100%]
[root@localhost yum.repos.d]#
(4)再看看该目录多了哪个文件

多了nginx.repo文件
(5)再次安装nginx
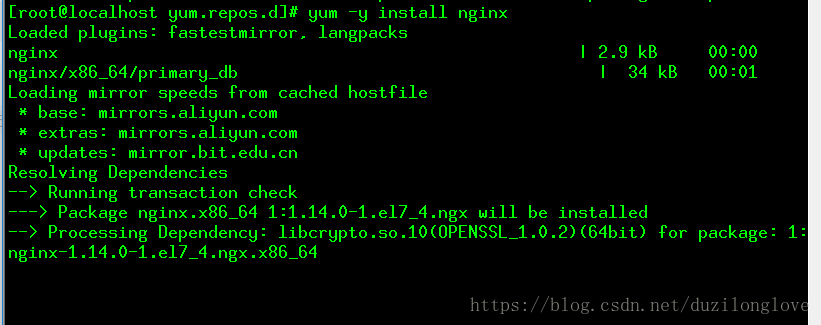
中间省略

安装成功
2、查看nginx默认安装目录
[root@localhost yum.repos.d]# whereis nginx
nginx: /usr/sbin/nginx /usr/lib64/nginx /etc/nginx /usr/share/nginx /usr/share/man/man8/nginx.8.gz
以下是Nginx的默认路径:
(1) Nginx配置路径:/etc/nginx/
(2) PID目录:/var/run/nginx.pid
(3) 错误日志:/var/log/nginx/error.log
(4) 访问日志:/var/log/nginx/access.log
(5) 默认站点目录:/usr/share/nginx/html
事实上,只需知道Nginx配置路径,其他路径均可在/etc/nginx/nginx.conf 以及/etc/nginx/conf.d/default.conf 中查询到
3、nginx相关的验证命令及启动命令
(1)nginx测试命令
看看是否安装正常
[root@localhost yum.repos.d]# nginx -t
nginx: the configuration file /etc/nginx/nginx.conf syntax is ok
nginx: configuration file /etc/nginx/nginx.conf test is successful
(2)启动nginx
命令一:
nginx命令二:
service nginx start   #centos6
或
systemctl start nginx.service   #centos7
nginx -s relaod 修改nginx.conf之后,可以重载
(3)停止nginx
./nginx -s stop
./nginx -s quit
./nginx -s quit:此方式停止步骤是待nginx进程处理任务完毕进行停止。
./nginx -s stop:此方式相当于先查出nginx进程id再使用kill命令强制杀掉进程。
查询nginx进程:
ps aux|grep nginx
(4)开机自启动
方法一:
开机自启动
即在rc.local增加启动代码就可以了。
vi /etc/rc.local
增加一行 /usr/local/nginx/sbin/nginx
设置执行权限:
chmod 755 rc.local
方法二:使用systemctl命令
4、CentOS 7如何开放其它的端口,比如8080
CentOS 7.0默认使用的是firewall作为防火墙,这里改为iptables防火墙。
1、关闭firewall:
systemctl stop firewalld.service
systemctl disable firewalld.service
systemctl mask firewalld.service
2、安装iptables防火墙
yum install iptables-services -y
3.启动设置防火墙
# systemctl enable iptables
# systemctl start iptables
4.查看防火墙状态
systemctl status iptables
5编辑防火墙,增加端口
vi /etc/sysconfig/iptables #编辑防火墙配置文件
-A INPUT -m state –state NEW -m tcp -p tcp –dport 22 -j ACCEPT
-A INPUT -m state –state NEW -m tcp -p tcp –dport 80 -j ACCEPT
-A INPUT -m state –state NEW -m tcp -p tcp –dport 3306 -j ACCEPT
:wq! #保存退出
3.重启配置,重启系统
systemctl restart iptables.service #重启防火墙使配置生效
systemctl enable iptables.service #设置防火墙开机启动
5、Centos 7 开放查看端口 防火墙关闭打开
5.1 Centos 7 firewall 命令:
查看已经开放的端口:
firewall-cmd --list-ports开启端口
firewall-cmd --zone=public --add-port=80/tcp --permanent命令含义:
–zone #作用域
–add-port=80/tcp #添加端口,格式为:端口/通讯协议
–permanent #永久生效,没有此参数重启后失效
重启防火墙
firewall-cmd --reload #重启firewall
systemctl stop firewalld.service #停止firewall
systemctl disable firewalld.service #禁止firewall开机启动
5.2 CentOS 7 以下版本 iptables 命令
如要开放80,22,8080 端口,输入以下命令即可
/sbin/iptables -I INPUT -p tcp --dport 80 -j ACCEPT
/sbin/iptables -I INPUT -p tcp --dport 22 -j ACCEPT
/sbin/iptables -I INPUT -p tcp --dport 8080 -j ACCEPT
然后保存:
/etc/rc.d/init.d/iptables save查看打开的端口:
/etc/init.d/iptables status关闭防火墙
1) 永久性生效,重启后不会复原
开启: chkconfig iptables on
关闭: chkconfig iptables off
2) 即时生效,重启后复原
开启: service iptables start
关闭: service iptables stop


 1万+
1万+


 被折叠的 条评论
为什么被折叠?
被折叠的 条评论
为什么被折叠?
 到【灌水乐园】发言


