Error Handling in Go
Mastering pragmatic error handling in your Go code

This post is part of the “Before you go Go” series, where we explore the world of Golang, provide tips and insights you should know when writing Go, so you don’t have to learn them the hard way.
I assume you have at least some basic Go background, but if you feel at any point you’re not familiar with the materials discussed, feel free to pause, research and come back.
Now that we got all of this out of the way, let’s Go!
Go’s approach to error handling is one of its most controversial and misused features. In this article, you’ll learn how Go approaches errors and understand how they work under the hood. You’ll explore a couple of different approaches to it, take a look at the go source code and the standard library for some insights about how errors work and how to work with them. You’ll learn how Type Assertions play an important role in handling them, and see upcoming changes to error handling, planned to be released in Go 2.

Introduction
First thing’s first: Errors in Go are not Exceptions. Dave Cheney wrote an epic blog post about it, so I’ll refer you to it and summarise: In other languages, you are uncertain if a function may throw an exception or not. Instead of throwing exceptions, Go functions support multiple return values, and by convention, this ability is commonly used to return the function’s result along with an error variable.

If your function can fail for some reason, you should probably return the predeclared error type from it. By convention, returning an error signals the caller there was a problem, and returning nil represents no error. This way, you’re letting the caller understand there was a problem, and let them deal with it: whoever calls your function knows they should not rely on the result before checking the error. If error is not nil, it is their responsibility to check for it and handle it (log, return, serve, invoke some retry/cleanup mechanism, etc.).
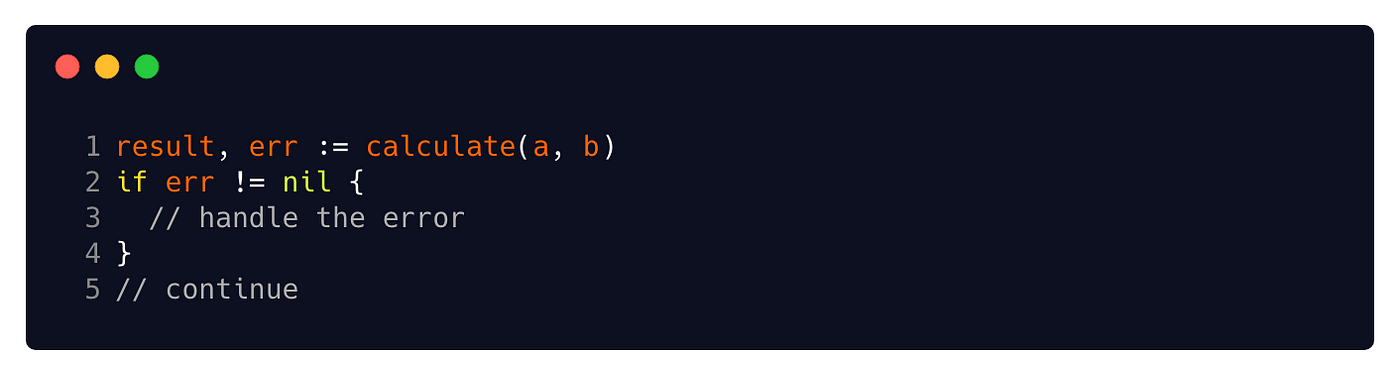
These snippets are very common in Go, and some see them as a whole lot of boiler plate code. The compiler treats unused variables as compilation errors, so if you’re not going to check the error, you should assign them to the blank identifier. But as convenient as it is, errors should not be ignored.

Returning the error along with the results, along with Go’s strict type system, makes programming errors that much harder to write. You should always assume the function’s value is corrupted unless you’ve checked the error it returned, and by assigning the error to the blank identifier, you explicitly ignore that your function’s value may be corrupt.

Go does have a panic and recover mechanism, which is also described in another detailed Go blog post. But these are not meant to mimic exceptions. In the words of Dave, “When you panic in Go, you’re freaking out, it’s not someone else’s problem, it’s game over man”. They’re fatal, and lead to a crash in your program. Rob Pike coined the “Don’t Panic” proverb, which is self-explanatory: you should probably avoid it, and return errors instead.
“Errors are values.”
“Don’t just check errors, handle them gracefully”
“Don’t panic”
all of Rob Pike’s Go Proverbs
Under the hood
The error Interface
Under the hood, the error type is a simple single method interface, and if you’re not familiar with it, I highly recommend going over this post in the official Go Blog.
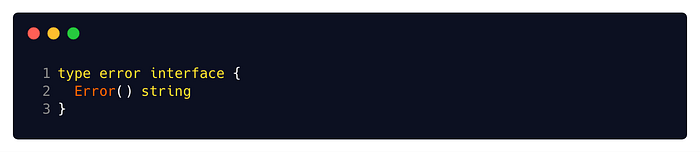
It’s easy to implement your own errors, and there are various approaches to custom structs implementing the Error() string method. Any struct implementing this one method is considered a valid error value, and can be returned as such.
Let’s explore a few such approaches.
The built-in errorString struct
The most commonly used and widespread implementation of the error interface is the built-in errorString struct. It is the leanest implementation you can think of.
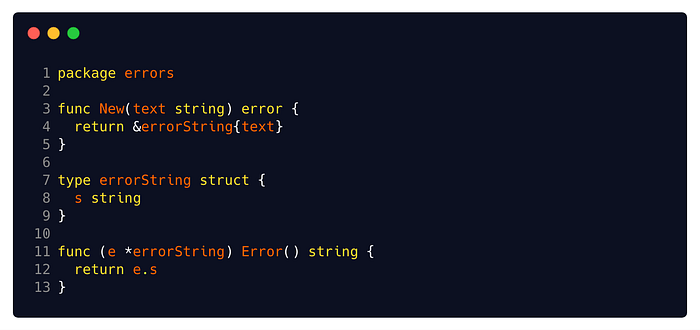
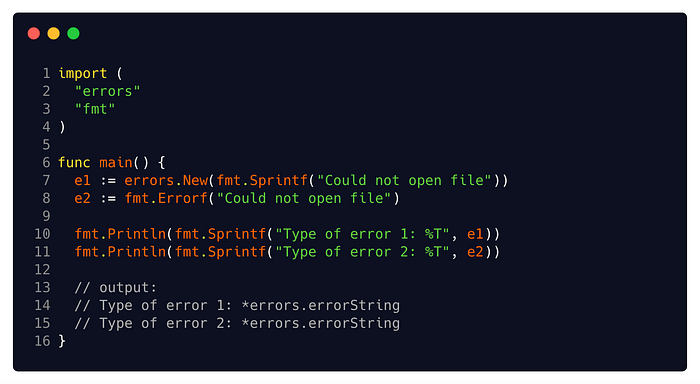
You can see its simplistic implementation here. All it does is hold a string, and that string is returned by the Error method. That error string can be formatted with data by us, say, with fmt.Sprintf. But other than that, it does not pack any other capabilities. If you use the built-in errors.New or fmt.Errorf, you are already using it.
github.com/pkg/errors
Another simple example is the pkg/errors package. Not to be confused with the built-in errors package you learned about earlier, this package provides additional important capabilities such as error wrapping, unwrapping, formatting and stack trace recording. You can install the package by running go get github.com/pkg/errors .

In those cases where you need to attach stack traces to your errors, or attach necessary debugging information to the error, using this package’s New or Errorf functions provides errors that already record your stack trace, and you can attach simple metadata using its formatting capabilities. Errorf implements the fmt.Formatter interface, meaning you can format it using the fmt package runes ( %s , %v , %+v etc).

This package also introduces the errors.Wrap and errors.Wrapf functions. These functions add context to an error with a message and stack trace at the point they were called. This way, instead of simply returning an error, you can wrap it with its context and important debug data.

Errors wrapping errors support the Cause() error method, that returns their inner error. Also, they can be used with the errors.Cause(err error) error function which retrieves the underlying inner-most error within an error.
Working with Errors
Type Assertion
Type Assertion serves a great role when working with errors. You’ll use them to assert information out of an interface value, and since error handling deals with custom implementations of the error interface, performing assertions on errors is a very handy tool.
Its syntax is the same for all its purposes — x.(T) , provided x is of an interface type. x.(T)asserts that x is not nil and that the value stored in x is of type T. In the next couple of sections, you’re going to take a look at the two ways to use type assertions — with a concrete type T and with an interface type T.
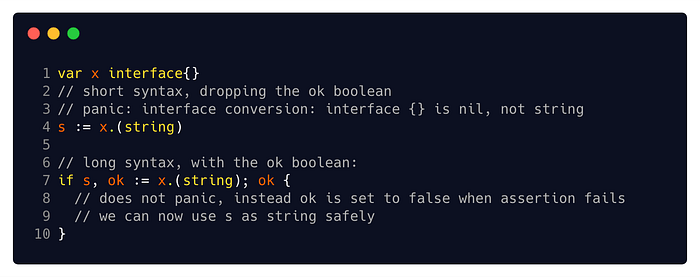
Side note regarding syntax: type assertion can be used with both short syntax (which panics when assertion fails), and elongated syntax (which uses an OK-boolean to indicate success or failure). I always recommend taking the long one over the short one, since I prefer checking the OK variable instead of dealing with a panic.
Asserting with interface type T
Performing type assertion x.(T) with an interface typeT asserts that x implements the T interface. This way you can guarantee an interface value implements an interface and only if it does, you will be able use its methods.

To understand how this can be leveraged, let’s take a quick look in the pkg/errors again. You already know the errors package, so let’s dive into the errors.Cause(err error) error function.
This function gets an error and extracts the most internal error it wraps (that which no longer wraps another error inside it). It might seem simple, but there are plenty of great things you can learn from this implementation:
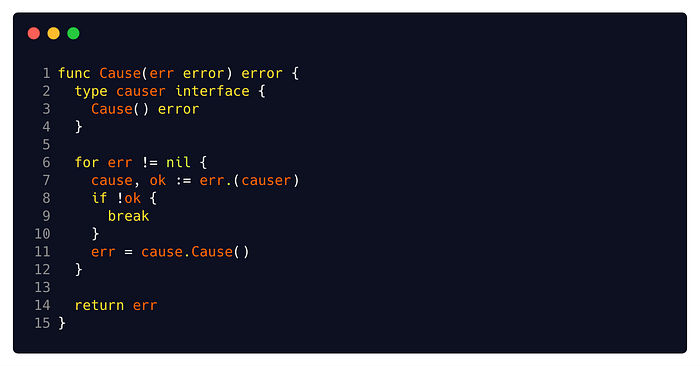
The function gets an error value and it can’t assume the err argument it receives is a wrapped error (one that supports the Cause method). So before calling the Cause method, it is necessary to check that you’re dealing with an error that implements this method. By performing the type assertion in each iteration of the for loop, you can make sure the cause variable supports the Cause method, and can keep on extracting internal errors from it until you reach an error which does not have a cause.
By creating a lean, local interface containing just the methods you need and performing the assertion on it, your code is decoupled from other dependencies. The argument you received doesn’t have to be a known struct, it just needs to be an error. Any type implementing the Error and Cause methods works here. So, if you implement the Cause method in your custom error type, you can use this function with it instantly.
There’s one small catch you should be aware of, though: interfaces may change, and so you should maintain your code carefully, so your assertions don’t break. Remember to define your interfaces where you use them, keep them lean, and maintain them carefully and you should be fine.
Lastly, If you only care about one method, it’s sometimes more convenient making the assertion on an anonymous interface containing only the method you rely on, i.e. v, ok := x.(interface{ F() (int, error) }). Using anonymous interfaces can help decoupling your code from possible dependencies, and can help guard your code from possible changes in interfaces.
Asserting with concrete type T & Type Switches
I will preface this section by introducing two similar error handling patterns that suffer from a couple of drawbacks and pitfalls. It doesn’t mean they’re not common, though. Both of them can be handy tools in small projects, but they don’t scale well.
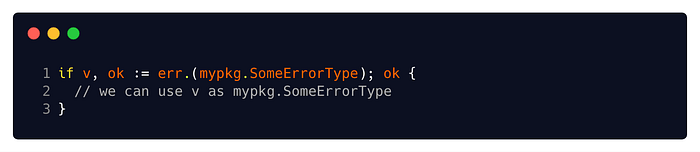
The first one is the second kind of type assertion: Performing type assertion x.(T) with a concrete type T. It asserts the value of x is of type T, or it is convertible to type T.
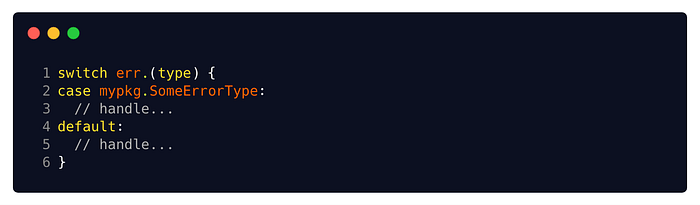
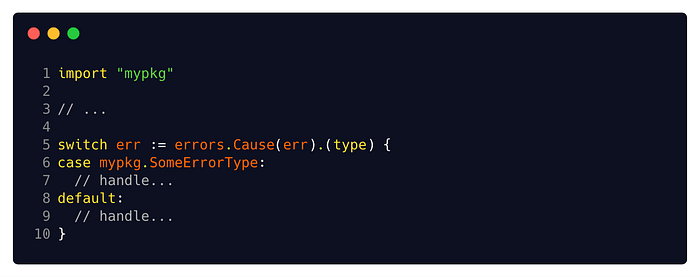
The other one is the Type Switch pattern. Type switches combine a switch statement with type assertion, using the reserved type keyword. They are especially common in error handling, where knowing the underlying type of an error variable can be very helpful.
The big drawback of both approaches is that they both lead to code coupling with their dependencies. Both examples need to be familiar with the SomeErrorType struct (which needs to be exported, obviously), and need to import the mypkg package.
In both approaches, when handling your errors, you must be familiar with the type and import its package. It gets worse when you are dealing with wrapped errors, where the cause of the error can be an error created in an internal dependency you are not, and should not be, aware of.
Type switches differentiate between*MyStruct and MyStruct. So if you’re not sure if you are dealing with a pointer or an actual instance of a struct, you’ll have to provide both. Moreover, just like switches, cases in type switches do not fall through, but unlike switches, usage of fallthrough is forbidden in type switches, so you’ll have to use comma and provide both options, which is easy to forget.

Wrapping up
That’s it! You’re now familiar with errors and should be ready to tackle any errors your Go app may throw (or actually return) your way!
Both errors packages present simple yet important approaches to errors in Go, and if they satisfy your needs, they are excellent choices. You can easily implement your own custom error structs, and enjoy the benefits of Go’s error handling when combining them with pkg/errors.
When you scale out of the simple errors, using type assertions properly can be a great tool to handling different errors. Either by using type switches or by asserting an error’s behavior and checking for interfaces it implements.
What’s next?
Go’s error handling is a very hot topic these days. Now that you’ve got the basics, you may be interested in what the future holds in store for Go’s error handling!
It gets lots of attention in the upcoming Go 2 version, and you can already take a look at the draft design. Also, During dotGo 2019, Marcel van Lohuizen had an excellent talk about the subject I just can’t recommend enough — “Go 2 Error Values Today”.
There are plenty more approaches, tips and tricks, clearly, and there is no possible way I can include them all in a single post! Regardless, I hope you’ve enjoyed this post, and I’ll see you on the next instalment of the “Before you go Go” series!
