1. 项目介绍
GitCode Pocket 是一个基于 OpenHarmony/ArkUI-X 开发的移动端应用,用于浏览和搜索 GitCode 平台上的项目、用户和组织。本教程将指导初学者学习、模仿并复刻这个项目。
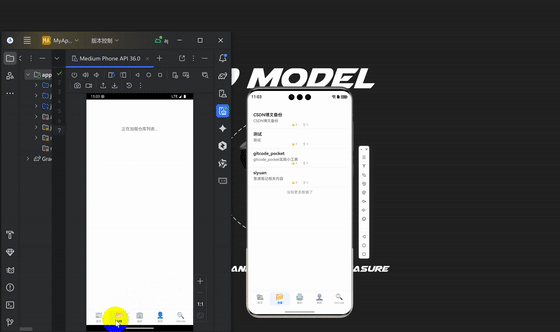
结果预览

技术栈
- 开发框架: OpenHarmony/ArkUI-X
- 开发语言: TypeScript + ArkTS
- UI 框架: ArkUI
- 网络请求: @ohos.net.http
- 状态管理: 组件内状态管理(@State)
2. 项目结构分析
├── AppScope/                # 应用全局配置
├── entry/                   # 应用主模块
│   ├── src/main/ets/        # 主要代码目录
│   │   ├── components/      # 自定义组件
│   │   ├── entryability/    # 应用入口能力
│   │   ├── pages/           # 页面组件
│   │   ├── services/        # API服务层
│   │   └── utils/           # 工具类
│   └── src/main/resources/  # 资源文件
└── hvigor/                  # 构建配置
3. 核心组件实现
3.1 底部导航栏(BottomTabBar)
底部导航栏是应用的核心导航组件,允许用户在不同页面间切换。
实现思路
- 定义 TabItem 接口,包含导航项的基本信息
- 使用 @Component 装饰器创建 BottomTabBar 组件
- 使用 ForEach 循环渲染导航项
- 处理导航项的点击事件
代码实现
// 定义TabItem接口
interface TabItem {
  name: string;
  icon: string;
  activeIcon: string;
  symbol: string;
}

@Component
export struct BottomTabBar {
  @Prop currentIndex: number;
  onChange: (index: number) => void = () => {};

  private tabs: TabItem[] = [
    { name: '首页', icon: 'home', activeIcon: 'home_filled', symbol: '📰' },
    { name: '仓库', icon: 'folder', activeIcon: 'folder_filled', symbol: '📂' },
    { name: '组织', icon: 'group', activeIcon: 'group_filled', symbol: '🏢' },
    { name: '我的', icon: 'user', activeIcon: 'user_filled', symbol: '👤' },
    { name: 'GitCode', icon: 'search', activeIcon: 'search_filled', symbol: '🔍' }
  ];

  build() {
    Row() {
      ForEach(this.tabs, (tab: TabItem, index: number) => {
        Column() {
          // 使用表情符号作为图标
          Text(tab.symbol)
            .fontSize($r('app.float.font_size_xxlarge'))
            .margin({ bottom: 2 })

          Text(tab.name)
            .fontSize($r('app.float.font_size_small'))
            .fontColor(this.currentIndex === index ? $r('app.color.primary_color') : $r('app.color.text_tertiary'))
            .fontWeight(this.currentIndex === index ? FontWeight.Bold : FontWeight.Normal)
        }
        .onClick(() => {
          this.onChange(index);
        })
        .layoutWeight(1)
        .height(50)
        .justifyContent(FlexAlign.Center)
        .alignItems(HorizontalAlign.Center)
      }, (item: TabItem) => item.name)
    }
    .backgroundColor($r('app.color.card_background'))
    .height($r('app.float.tab_bar_height'))
  }
}
3.2 主页面(Main)
主页面是应用的容器,负责管理不同页面的切换。
实现思路
- 创建 @Entry 装饰的 Main 组件
- 使用 @State 管理当前选中的页面索引
- 根据索引渲染不同的页面组件
- 集成 BottomTabBar 组件,处理页面切换
代码实现
import { BottomTabBar } from '../components/BottomTabBar';
import { Home } from './Home';
import { Repositories } from './Repositories';
import { Organizations } from './Organizations';
import { Profile } from './Profile';
import { GitCodeSearch } from './GitCodeSearch';

@Entry
@Component
struct Main {
  @State currentIndex: number = 0;
  @State pageTitle: string = '首页';

  onPageChange(index: number): void {
    this.currentIndex = index;
    // 更新页面标题
    switch (index) {
      case 0: this.pageTitle = '首页'; break;
      case 1: this.pageTitle = '仓库'; break;
      case 2: this.pageTitle = '组织'; break;
      case 3: this.pageTitle = '我的'; break;
      case 4: this.pageTitle = 'GitCode'; break;
      default: this.pageTitle = '首页';
    }
  }

  build() {
    Column() {
      // 内容区域
      if (this.currentIndex === 0) {
        Home().layoutWeight(1)
      } else if (this.currentIndex === 1) {
        Repositories().layoutWeight(1)
      } else if (this.currentIndex === 2) {
        Organizations().layoutWeight(1)
      } else if (this.currentIndex === 3) {
        Profile().layoutWeight(1)
      } else if (this.currentIndex === 4) {
        GitCodeSearch().layoutWeight(1)
      }

      // 底部TabBar
      BottomTabBar({
        currentIndex: this.currentIndex,
        onChange: (index: number) => this.onPageChange(index)
      })
    }
    .width('100%')
    .height('100%')
  }
}
4. 首页 API 调用流程详解
4.1 首页组件(Home)
首页负责展示 GitCode 平台上的项目列表,支持下拉刷新和上拉加载更多。
实现思路
- 使用 @State 管理页面状态(加载中、刷新中、错误信息等)
- 在 aboutToAppear 生命周期函数中加载初始数据
- 实现 loadData 方法处理网络请求
- 实现 onRefresh 和 onLoadMore 方法处理刷新和加载更多
- 根据不同状态渲染不同 UI
代码实现
import { Repository } from '../utils/Types';
import { RefreshWrapper } from '../components/RefreshWrapper';
import ApiService from '../services/ApiService';
import PaginationHelper from '../utils/PaginationHelper';

@Component
export struct Home {
  @State refreshing: boolean = false;
  @State hasMoreData: boolean = true;
  @State projectList: Repository[] = [];
  @State loading: boolean = false;
  @State errorMessage: string = '';
  private apiService: ApiService = ApiService.getInstance();
  private paginationHelper: PaginationHelper = new PaginationHelper(10);

  aboutToAppear(): void {
    this.loadData();
  }

  async loadData(): Promise<void> {
    if (this.loading) return;

    this.loading = true;
    this.errorMessage = '';

    try {
      // 调用API服务搜索项目
      const data = await this.apiService.searchProjects('git', this.paginationHelper);

      // 根据当前页码处理数据
      if (this.paginationHelper.getCurrentPage() === 1) {
        this.projectList = data; // 第一页直接替换数据
      } else {
        this.projectList = [...this.projectList, ...data]; // 后续页追加数据
      }

      // 判断是否还有更多数据
      this.hasMoreData = data.length === this.paginationHelper.getPageSize();
    } catch (error) {
      console.error('加载项目列表失败:', error);
      this.errorMessage = (error as Error).message || '加载失败,请重试';
    } finally {
      this.refreshing = false;
      this.loading = false;
    }
  }

  onRefresh(): void {
    this.refreshing = true;
    this.paginationHelper.reset(); // 重置分页
    this.loadData();
  }

  onLoadMore(): void {
    if (this.hasMoreData && !this.loading) {
      this.paginationHelper.setCurrentPage(this.paginationHelper.getNextPage()); // 切换到下一页
      this.loadData();
    }
  }

  build() {
    Column() {
      // 根据不同状态渲染不同UI
      if (this.loading && this.projectList.length === 0) {
        // 初始加载状态
        Column() {
          Text('正在加载项目列表...')
        }
      } else if (this.errorMessage) {
        // 错误状态
        Column() {
          Text('加载失败')
          Text(this.errorMessage)
          Button('重试')
            .onClick(() => this.loadData())
        }
      } else if (this.projectList.length === 0) {
        // 空数据状态
        Column() {
          Text('暂无项目数据')
        }
      } else {
        // 正常显示数据
        RefreshWrapper({
          refreshing: this.refreshing,
          onRefresh: () => this.onRefresh(),
          onLoadMore: () => this.onLoadMore(),
          hasMoreData: this.hasMoreData,
          list: this.projectList
        })
      }
    }
    .width('100%')
    .height('100%')
  }
}
5. API 服务层设计
5.1 服务层架构
项目采用了分层架构设计,API 服务层包含以下核心组件:
- ApiService: 对外提供统一的 API 接口,是业务逻辑和网络请求的中间层
- GitCodeApiService: 负责具体的 GitCode API 调用实现
- HttpClient: 封装网络请求的工具类
- AuthManager: 管理用户认证信息
5.2 ApiService 实现
ApiService 采用单例模式设计,对外提供统一的 API 接口。
export default class ApiService {
  private static instance: ApiService;
  private gitCodeApiService: GitCodeApiService;
  private authManager: AuthManager;

  private constructor() {
    this.gitCodeApiService = GitCodeApiService.getInstance();
    this.authManager = AuthManager.getInstance();
  }

  // 获取单例实例
  public static getInstance(): ApiService {
    if (!ApiService.instance) {
      ApiService.instance = new ApiService();
    }
    return ApiService.instance;
  }

  // 搜索项目
  public async searchProjects(query: string, pagination: PaginationHelper): Promise<Repository[]> {
    try {
      const params = pagination.getPaginationParams();
      // 调用GitCodeApiService搜索项目
      const gitCodeProjects = await this.gitCodeApiService.searchProjects(
        query,
        params.page as number,
        params.size as number
      );

      // 转换数据格式
      return gitCodeProjects.map(project => ({
        id: Number(project.id),
        name: project.name,
        description: project.description || '',
        stargazers_count: project.stargazers_count,
        forks_count: project.forks_count
      } as Repository));
    } catch (error) {
      console.error('搜索项目失败:', error);
      throw new Error('搜索项目失败');
    }
  }
}
5.3 GitCodeApiService 实现
GitCodeApiService 负责具体的 API 请求实现,包括 URL 构建、请求发送和响应处理。
import http from '@ohos.net.http';
import { BusinessError } from '@ohos.base';
import AuthManager from '../utils/AuthManager';
import { GitCodeUser, GitCodeProject, GitCodeGroup } from '../utils/Types';

export default class GitCodeApiService {
  private static instance: GitCodeApiService;
  private authManager: AuthManager;
  private baseUrl: string = 'https://api.gitcode.com';

  private constructor() {
    this.authManager = AuthManager.getInstance();
  }

  public static getInstance(): GitCodeApiService {
    if (!GitCodeApiService.instance) {
      GitCodeApiService.instance = new GitCodeApiService();
    }
    return GitCodeApiService.instance;
  }

  // 构建完整URL
  private buildURL(endpoint: string, params: Record<string, string | number>): string {
    let url = `${this.baseUrl}${endpoint}`;

    // 添加查询参数
    const queryParts: string[] = [];
    const keys = Object.keys(params);
    for (let i = 0; i < keys.length; i++) {
      const key = keys[i];
      const value = params[key];
      queryParts.push(`${encodeURIComponent(key)}=${encodeURIComponent(String(value))}`);
    }

    if (queryParts.length > 0) {
      url += (url.includes('?') ? '&' : '?') + queryParts.join('&');
    }

    return url;
  }

  // 发送HTTP请求
  private async request<T>(endpoint: string, params: Record<string, string | number>): Promise<T> {
    try {
      const url = this.buildURL(endpoint, params);
      const httpRequest = http.createHttp();
      const response = await httpRequest.request(url, {
        method: http.RequestMethod.GET,
        header: {
          'Accept': 'application/json',
          'Content-Type': 'application/json',
          ...this.getAuthHeaders() // 添加认证头
        }
      });

      if (response.responseCode === 200) {
        const result = response.result as string;
        return JSON.parse(result) as T;
      } else {
        throw new Error(`请求失败: 错误码 ${response.responseCode}`);
      }
    } catch (error) {
      console.error('网络请求失败:', error);
      throw new Error('网络请求失败');
    }
  }

  // 搜索项目
  public async searchProjects(query: string, page: number = 1, perPage: number = 20): Promise<GitCodeProject[]> {
    if (!query) {
      return [];
    }

    try {
      const params: Record<string, string | number> = {};
      params.q = encodeURIComponent(query);
      params.per_page = perPage;
      params.page = page;

      return this.request<GitCodeProject[]>('/api/v5/search/repositories', params);
    } catch (error) {
      console.error('搜索项目失败:', error);
      throw new Error('搜索项目失败');
    }
  }
}
6. API 调用流程详解
6.1 完整的 API 调用链路
Home组件 (页面) → ApiService (业务逻辑) → GitCodeApiService (API请求) → 网络请求 → GitCode API
6.2 调用步骤分解
-
触发请求:
- 页面加载时调用
aboutToAppear()方法 aboutToAppear()调用loadData()方法
- 页面加载时调用
-
处理请求:
loadData()方法检查加载状态,避免重复请求- 调用
apiService.searchProjects()方法
-
业务逻辑处理:
ApiService.searchProjects()准备请求参数- 调用
gitCodeApiService.searchProjects()方法
-
网络请求发送:
GitCodeApiService.searchProjects()构建请求参数- 调用
request()方法发送 HTTP 请求 request()方法构建完整 URL,添加认证头- 使用
http.createHttp()创建 HTTP 请求 - 发送 GET 请求到 GitCode API
-
响应处理:
- 检查响应状态码
- 解析 JSON 响应数据
- 返回解析后的数据
-
数据更新:
ApiService.searchProjects()将 GitCodeProject 转换为 Repository 类型- 返回转换后的数据
loadData()更新组件状态- 根据状态更新 UI
6.3 数据流向
GitCode API → GitCodeProject[] → Repository[] → @State projectList → UI渲染
7. 状态管理
7.1 组件内状态
项目主要使用组件内状态管理(@State 装饰器)来管理 UI 状态:
- refreshing: 控制下拉刷新状态
- hasMoreData: 控制是否有更多数据
- projectList: 存储项目列表数据
- loading: 控制加载状态
- errorMessage: 存储错误信息
7.2 状态更新流程
- 初始状态:
loading = false,projectList = [],errorMessage = '' - 调用
loadData():loading = true - 请求成功:
loading = false- 更新
projectList - 更新
hasMoreData
- 请求失败:
loading = false- 更新
errorMessage
- 状态变化触发 UI 重新渲染
8. 如何运行项目
8.1 环境准备
- 安装 DevEco Studio
- 配置 OpenHarmony/ArkUI-X 开发环境
- 安装 Node.js 和 npm
8.2 运行步骤
- 克隆项目到本地
- 使用 DevEco Studio 打开项目
- 连接设备或启动模拟器
- 点击运行按钮
9. 总结
通过本教程,你已经学习了 GitCode Pocket 项目的基本结构和核心实现细节,特别是:
- 项目的整体架构设计
- 底部导航栏的实现
- 首页的 API 调用流程
- API 服务层的设计和实现
- 状态管理和 UI 渲染
希望本教程能够帮助你理解并独立复现这个项目,为你后续的 OpenHarmony/ArkUI-X 开发打下坚实的基础。
欢迎来到这里!
我们正在构建一个小众社区,大家在这里相互信任,以平等 • 自由 • 奔放的价值观进行分享交流。最终,希望大家能够找到与自己志同道合的伙伴,共同成长。
注册 关于